AUTOMOTIVE PAINTING - A PLEBS GUIDE
As you know there are several painting projects that will be required as part of the engine conversion process. These include painting the front and rear subframes, and painting the interior of the engine bay. These are the first two jobs that I will examine here. The good thing about these jobs is that they are fairly straightforward and the quality of the finish does not really have to be as high as that for the body of the car. Obviously I will be trying for best possible finish but it won't be the end of the world! Also as stated in millions of other places, I have done a fair amount of research on this topic and asked a lot of people, but I am myself no expert, if in doubt ask and expert. Also if there is an expert out there and you see some glaring bullshit in my answers please email me.
The next job will be doing a full back to metal respray of the car. But this will not occur until probably December 05 or early O6 as finishing the engine conversion is my main priority and there isn't much point painting a car only to find you can't register it. Also I have started the engine bay painting (due to request that I tidy up the engine bay made by my engineer) examples at the end.
So here we go step by step through the painiting of the subframe
Equipment
Obviously to paint something you need a paint setup. Having spoken to several people in the know including other amateurs on Ausmini, a mate a work who previously was a fully qualified automotive refinisher, and tradespeople, here is what I have found out. The basic requirements are: (a more detailed explanation is given below)
Air Compressor
The subject of compressor is quite large so I will try and keep this short. There are basically two types of air compressors, Electric and Petrol/Diesel. The one for the DIY'er is generally electric, the petrol/diesel ones are really for use in remote areas. From here they can sorted into lubricated or dry compressor. As the name implies they either use oil or not, go the lubricated as they heat up less (air is cooler and therefore denser) and run more efficiently which means less time waiting for the compressor to fill the tank, both good things. The final division is into single or dual phase. This basically means that the air going into the tank is compressed once or twice. A dual phase compressor would be nice but the price basically doubles for a dual phase compressor. The other difference is in drive, there are direct drive and belt driven compressors. The belt driven style is more efficient but you pay dearly for this capability.
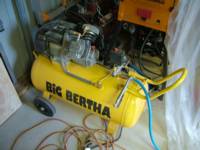
What did I buy. I bought a single phase, direct drive, lubricated, electric air compressor with an 80ltr tank from Western Tool Distributors, known as a Big Bertha, this can produce supposedly 15cfm at 90psi so I will be curious to see if this is the case. Aim to try and buy the biggest compressor you can. Why? It all comes down to effiencey (known as the charge capacity), basically the air compressor works by having the small engine compress the air into a tank. Once the air in the tank is compressed to the desired level eg. 90PSI the engine stops. You then use the air coming out of the tank to run your tools or gun. Obviously as you use the air the pressure in the tank starts to drop and it after a certain period needs bumping up. Now the period of time you can run your gun between the time the motor stops and the time it starts again because of pressure drop is the level of efficiency.
Everytime the motor has to start up again you have to stop using your gun or obviously the tank will take a long time to fill up again making the motor work very hard and the air in the tank get very hot (amongst other things). Now if you are trying to paint a whole car then havng to wait minutes to spray again can mean that the paint has already flashed off. Subsequently you get dry patches in your paint which can lead to a very dusty (bad) paintjob.
A lot of experts say that you need a compressor with a tank of more than 90 litres some say even bigger again like 200 litres. This is partially bullshit. I have spoken to amateurs who have sprayed a car quite successfully with a very small compressor. The main secret is to try and do the paintjob in sections if you have a small compressor. Eg. Bonnet, doors, boot lid separately, and do the large parts in section similar to the way you would do spot paint repairs.
This is from the Netshoppe page:
"The compressor size that you need depends on what you are doing. The RS uses 8 - 14 cfm of air. We have customers using as little as a 1 1/2 horsepower compressor to run their guns. The only drawback to the smaller compressors is that you are running off the tank more than the pump and, if you are doing continuous spraying, you will need to wait for the compressor to recharge. So if you are doing occasional spraying of smaller woodwork or auto parts a small compressor will probably be suitable. If you run a body shop, marina, or millwork plant you will probably want a 5+ hp compressor. "
Spray Gun
Here is another area full of contradictions. First of all go talk to a Automotive Paint Shop (who usually sell guns and compressors etc), actually go to several, because you will find that spray painters are a parochial lot. If you don't understand ask, most of the time they are pretty passionate about it and will happily talk for hours (especially if the shop is quiet) about spray painting.
Alot of people are spruiking the HVLP guns, for a variety of reasons all of which are quite valid. The main reason is that they have what is called a high TEC or tranfer efficiency, in other words a lot more of the paint remains on the car. Conventional spray guns run with an air pressure of 40-70 psi. HVLP guns utilize a high volume of air delivered at 10 psi or less. This results in a more controlled spray pattern, less bounceback and ultimately less overspray. This is all very well and good but as with anything there are trade offs.
The except below was taken from an article on Netshoppe concerning the Lexaire range of guns, the statements in brackets are my contribution.
"Most HVLP guns are slower (ultimately they deliver slightly less paint each pass which means more passes, more time), don't produce as good of a finish (this is quite a contentious statement but I have read in several places that the finish is not as good as from a conventional gun especially with low viscosity paints such as 2 pack, feel free to contradict me, this is just what I have read), and/or use inordinate amounts of air (this is certainly true, to run a HVLP gun properly you need at between 8 and 14 CFM FAD, this kind of CFM level is really only consistently achievable by large compressors of around 5hp (big), a small compressor will be constantly charging up. By no means is it impossible to run a HVLP off a small compressor it will just be a lot harder and trickier)."
What did I buy? Well I bought a gun that is kind of in the middle. I bought an Anest Iwata W400 spray gun. This gun has a high TEC of 65% and higher depending on the situation. But it is not a HVLP gun. It runs on a pressure of 2 to 3 bar or 30 - 50 psi which is at the lower end of the spectrum for convential guns, but a higher CFM of between 10 and 13.5 CFM, which is more like a HVLP gun. A very nice gun with a not very nice price tag ($450 AUD). Still you get what you pay for in this game especially with spray guns, I could have gone cheaper but the fact is the gun will probably last me the rest of my spray painting life.
Air Filter
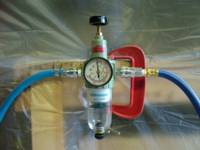
This is a pretty straight forward requirement. In the air there are contaminants such as dust and small particles of cocaine (which is why you feel drowsy if you take in too much air) and most importantly from a spray painting point of view, WATER. If you don't remove the water from the air you are using to spray with then it gets trapped under the paint and eventually you will get what are called "Fish Eyes" which look like perfectly round bubbles under the paint. The only solution is to rub these down with sandpaper and unfortunately start again. I used a Cormack Anest Iwata (say that when you're drunk) filter which cost about $70 AUD. You can go nuts with filters but this will do the job I may move up if I find this doesn't cut it.
Air Hose
Air hose is pretty much air hose. They come in usually 3 different guages being 1/4", 5/16" and 3/8". Most of the time 1/4" will suffice. In fact the connections to my air filter were for only 1/4" couplings so make sure that everything is the same guage. Most hoses are blue (yippee) and rated at 250 - 300psi which is way higher than any spary gun (and most air tools!).
TIP: The guy at the paint store gave me a hint when buying hose. Get a 2 metre length made up that goes from the compressor to your filter. This allows the air coming out of the compressor to cool down before getting to the filter which aids filtration, especially water which will become more of a solid than a vapour as it passes through the filter in its cooler state. Pretty smart huh, see what I mean about talking to the experts.
All right there's a bit of the theory over and done with. But wait there's more! While you now have all the bits (or most of them) to start spraying you need to connect it up and stuff. This might seem like a hassle but this is definitely something you want to do right and take your time with.
System Setup
Check the compressor. If it brand new this isn't such a problem but there are things you need to do. Most important if it is a lubricated pump is check the oil level. Next close the drain valve on the tank (and remember to undo it when you have finished as it lets out the condensation so you tanks doesn't rust from the inside out!).
Connect everything up. Buy yourself some connection tape (White tape that plumbers use to go on threads before connecting them up), this ensure a good perfectly airtight seal on each connection. Assuming you took my advice about the 2 metre length of hose, connect this to the outlet valve of your compressor (note: your compressor may not come with a quick connection for the hose, in which case you will need to purchase one. Connect the two metre hose to your filter system and then from your filter system to the gun. Once you have the whole thing setup then you can start testing.
First turn on your compressor. It should start buzzing away (depending on what it is quite a racket). Basically each compressor will have an upper compressor limit for the tank which will reached as the compressor fills the tank with air. Once this is accomplished the compressor should theoretically switch off and only come on again once the pressure in the tank drops to a pre-set level. For my compressor the upper limit was 125psi and the compressor would come on again once it dropped down to 80psi.
Now the filter came equipped with a pressure guage as well, which you can use to limit the amount of pressure that is delivered down the line to the actual gun. Now as stated earlier my gun is a bit of a hybrid and the best TEC level is delivered at 30 PSI. So I set the guage to deliver a level of 35PSI (5 PSI higher to allow for drop due to fact that I could only find a 15mtr hose (I will get a shorter one later). Alright then that's all done, you have air, you have your gun connect and I will assume that you have filled your gun with paint!
Gun Setup
Most advance guns have three settings, here is a brief explanation of what the three adjusters do:
- Air Flow Adjuster - This coontrols the amount of air passing through the gun and is usually located at the bottom of the gun handle directly next to where the hose to the gun attaches. Adjusting air flow can be vitally important as it will affect the paint finish (ie. too much air pressure and you get alot of paint bouncing off, too little and you get orange peel or a very thin dusty coat of paint).
- Paint Flow Adjuster - Sits at the end of the paint needle rod. This affects the amount of paint that is discharged when you hold down the trigger. This has a similar affect at the amount of air. To much paint and you get runs etc, too little paint at you get a thin dusty coat.
- Fan adjuster - What's this, well a decent sparygun comes with air horns, which if you look at the front of the gun are the two arms either side of the tip of the gun. These blow air at the same time the paint is coming out. This causes the paint to form a certain shape. If you turn the fan adjuster right off then you will get a circular spary pattern (which can be useful in certain circumstances), but generally especially for panel work you are aiming for an vertical elipse pattern (or the squashed football!). When you buy the gun there should be specs that come with it and generally they will describe the height of the spray pattern. In my case at 30PSI this gun should create a spary pattern of approximate 24cms high.
Creating a Spray Booth
This may seem like a lot of effort for very little reward but trust me it will make a difference. First of all it will ensure that any overspray generated will not cover everything else in your workshop with paint. There is nothing worse than tryng to clean atomised paint particles of your minilites! Also it ensure that contaminates are reduced. So the basic approach is this:
- Grab some large plastic drop sheets from your local paint or hardware supplier the bigger the better as it will stop you having to join them together.
- Organise yourself so that you have free movement around the space in question. In other words create a spotless space free of obstructions.
- Thoroughly clean the space. I spent a whole morning sweeping up and then sweeping up again. Some people even go so far as to wet the floor of the place they are spraying in to reduce the amount of dust that could rise during the painting process.
- Place drop sheets. Place them in a way that all three sides are covered.
You are now ready to start setting up the spray painting system...
Painting the Subframe
Now I went the standard route of etch primer, primer filler and enamel chassis paint. The were all K&H products because this is just a subframe not the actual body in which case I would probably go for a more expensive paint. But also as this my first foray I didn't want to pay $100 for a litre and then fuck it up.
Etch Primer
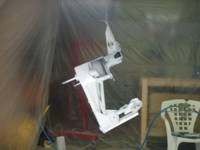
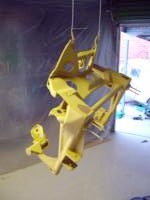
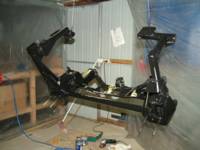
Here is a picture of the frame with the etch primer. A warning on etch primer, make sure you mix it thoroughly as it settles/separates very easily. I mixed it by hand only to find the majority of the paint sitting as a sludge at the bottom of the can (dammit). Anyway, remixed and sprayed a second coat (but because of the thinner consistency of the first coat I had to go around cleaning up the drips!)
Primer Filler
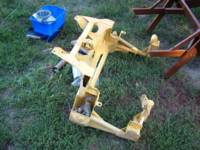
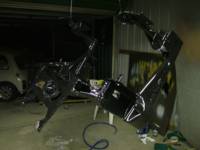
Here are some images of the primer filler. This went on alot easier than the etch primer mainly because I pulled my finger out and created a mixing attachment for my drill and gave it a damn good mixing. Due to the difficulty of painting the subframe because of some awkward angles there was a little bit of powdering of the finish which is usually caused by being too far away from the surface you are painting, which means the paint is actually drying before reaching the surface you are painting. Distance of the spraygun from the surface is vitally important as is the action of the gun.
One other thing was that there was a certain amount of lack of adherence or pooling in certain parts of the frame (the reason for this I am not certain of). This require me to wire wheel certain section and either repaint them will primer filler or feather sand them and just paint over with the chassis black enamel.
Wet Sanding
While the filler primer is great for filling in little inconsistencies it can go on a bit like porridge even under the best of conditions (though if you apply it correctly is should be pretty smooth!). Therefore once you have completed your painting to this stage (and allowed the paint to fully dry) you need to wet sand the finish back to get it nice and smooth before the final coats go on. A trick to use is to get a bucket of water and the 400 or 800 grade wet and dry sandpaper (I used 800 grit which did an excellent job of getting the paint very smooth but did not take off excessive amounts) and add some form of detergent to the water. This will stop your paper clogging with the paint dust and also make it easier to glide over the paint. It also removes some of the grease and wax at the same time!
Finishing Coat
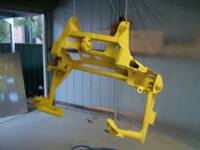
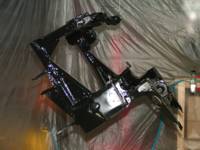
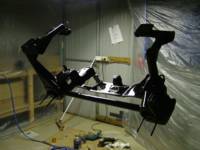
I used K&H Chassis Black Enamel (1pk air dry) for this part of the painting process and as you can see from the images it has come up even better than I expected. I will have to inspect it tomorrow to really see how it came up as you can't really tell how good it is until it has thoroughly dried, but here's hoping. If you are wondering why it looks chocolate coloured in some images, it is because of the flash for some reason???
Well had a quick look at it this morning and it still looks the business, but unfortunately (I have a strong feeling because of the colder nights we are starting to get) there are a few little sags but most are in places where they will never be seen, so I don't think I will bother trying to rectifying them unless I see really obvious ones.
Anyhow there you go how to spray paint a subframe. It is unfortunate, but because of the rapidly disappearing warm weather I have had to rush this (hence some of the problems highlighted). Given more time to prepare the subframe and the paint then I think the result would have been better. Also it is late but I will add to this page a bit as things progress so keep an eye out. But I should warn you that painting the body is a big project and I will not be attemtping this till summer 2006 (at the earliest).
Web Sites
http://www.ganet.org/dnr/p2ad/pblcations/paintbas.html
Glossary of Terms
The Engine Bay
Well as stated up top I am also sparying my engine bay, this was based on a request by my Engineer. His view was that a neat looking engine bay would go a long way to keeping mister rego inspector happy. And he is probably right it is just a pity that it takes so long that I am falling behind. But once this is done and the subframe is in I can wheel the car into the garage! After this is done then I need to attack the rear subframes which will also require painting, great!
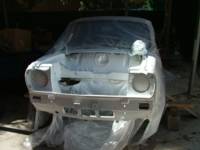
Anyway below are pictures of (left to right) the etch primer in white and the primer filler in yellow, and finally the sugan cane acrylic. The etch primer went on ok but was pretty thin (even after quite alot of mixing) and I still found thick stuff in the bottom (bugger!). The primer filler went on ok for the first coat but seem to go a bit funny on the second coat and I couldn't get a decent setting on the gun so I don't know what happen there. Oh well. I will sand her down with P800 wet and dry and she'll be fine (ended up sanding to a very nice finish. I got the paint joint to mix me a up what is hopefully a good match for the duco colour (pretty darn close). So tomorrow we find out how good I am at spraying acrylic lacquer...
 |
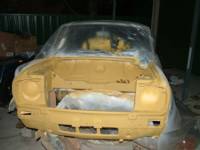 |
Well as you can see in the final picture I got there in the end. The coat is far from perfect but with a rub down with 800 grade wet and dry sandpaper and some mild cutting compound and buffing I am sure she'll come up OK. And as stated at the start this is purely cosmetic to keep the engineer and the Inspection Station boys happy. One day when I have a go at the car itself I will put in more practice. Also just an obvious hint if you can avoid it don't paint outside. A garage or similar is the perfect place as you can control the conditions. I had wind blowing around constantly so no surprise that the engine bay didn't turn out perfect.
